
 by
by 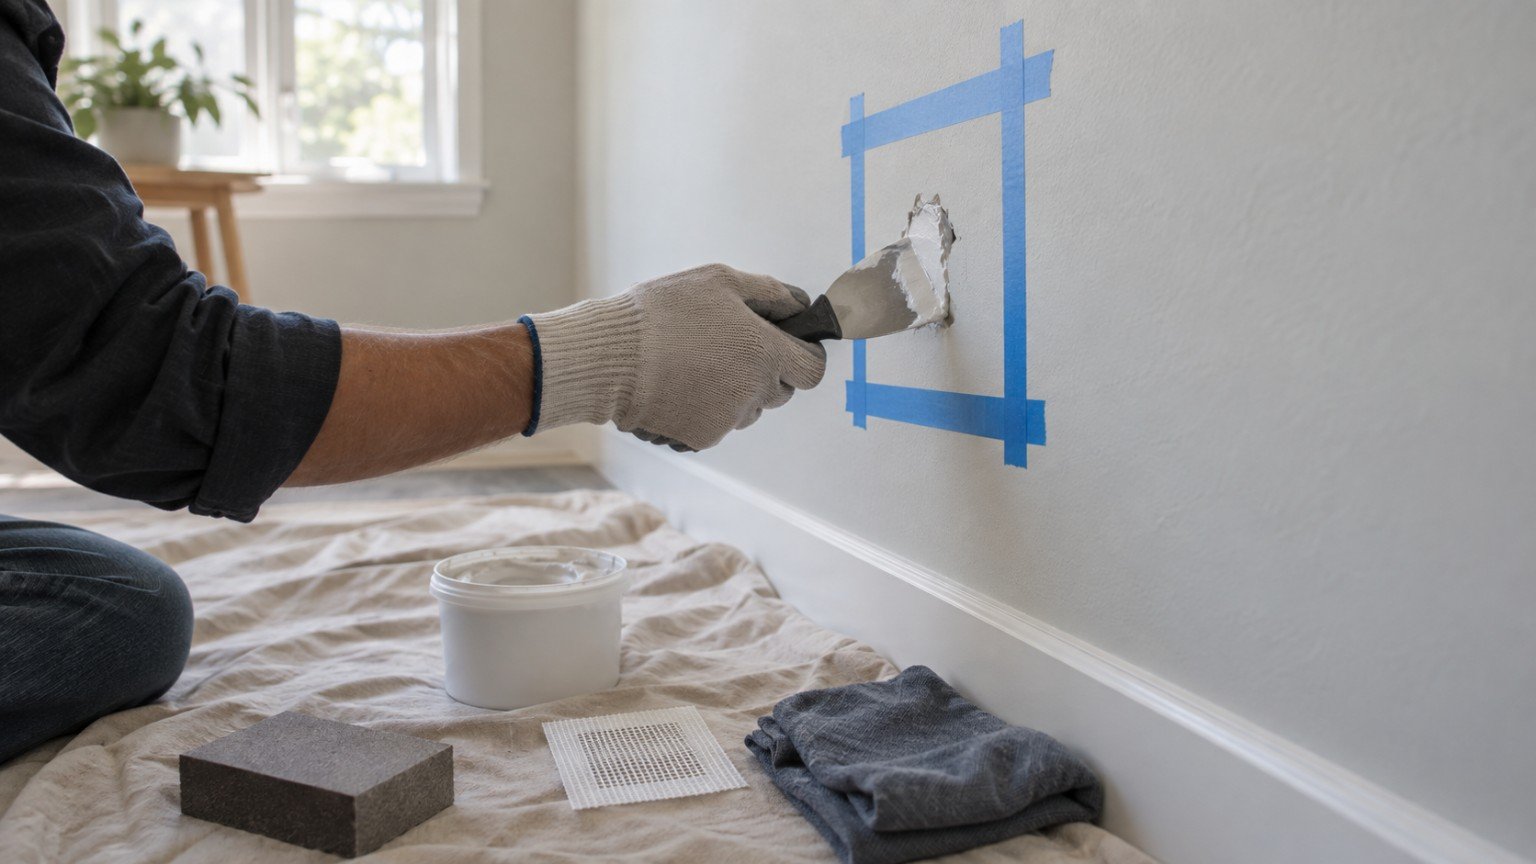
Nail holes, a doorhandle dent, a picture hook that missed the mark. Plasterboard damage is one of the most common small repairs in an Australian home, and it is also one of the most forgiving to fix yourself. You do not need trade experience, and for anything up to about the size of a fist, you do not need to cut out and replace a whole sheet either.
The method changes depending on how big the hole is. Here is how to handle each size safely and get a result that disappears once it is painted.
What you will need
- Spackling paste or all-purpose filler (pre-mixed tubs are easiest for beginners)
- A flexible filling knife or putty knife
- Fine sandpaper (around 180 to 220 grit)
- A damp cloth
- Matching paint and a small brush or roller
- For larger holes: a self-adhesive mesh patch and a wider filling knife
Pinhole and small nail holes
For anything under about 6mm, a single pass of filler is usually enough. Press a small amount of filler into the hole with the edge of your knife, working it in from a couple of directions so it fully fills the cavity rather than just sitting on the surface. Scrape the excess flush with the wall, let it dry according to the product’s instructions, then give it a light sand once it is fully cured. A second thin coat is worth doing if the filler has shrunk slightly as it dried, which is common with deeper holes.
Medium holes, such as a doorhandle dent
Holes in the 1 to 5cm range, like the dent a doorhandle leaves when a door swings too far, need a bit more care because there is more cavity for the filler to bridge. Clean any loose plasterboard dust or crumbling edges out of the hole first with a dry brush, then dampen the area very lightly with a cloth so the filler does not dry out too fast and crack. Apply filler in thin layers rather than one thick pass, letting each layer dry before adding the next. Overfill slightly, then sand back flush once fully cured. Two to three thin layers will generally give a stronger, flatter result than one thick one.
Larger holes (up to around 10 to 15cm)
Beyond about 5cm, filler alone will not have anything to hold onto and is likely to crack or fall out over time. This is where a self-adhesive mesh patch earns its keep. Cut the patch a little larger than the hole, press it firmly over the damage so the edges stick to the surrounding plasterboard, then apply filler over the top in thin layers, feathering the edges out wider than the patch itself so there is no visible ridge once painted. Sand lightly between coats and finish with a fine sand once fully dry.
Painting over the repair
Filler is porous and will often show as a slightly duller patch under paint if it is not sealed first. A light coat of primer or sealer over the repaired area before topcoat gives a much more even, invisible finish, particularly with satin or semi-gloss paints that show sheen differences more than flat paint does. Match the paint as closely as you can, and if the wall colour has faded over the years, a full wall repaint (rather than just the patch) may give a more consistent result.
When it is worth calling a professional instead
Most nail holes, dents and small knocks are genuinely safe and straightforward DIY. It is worth getting a plasterer or builder to look at the damage instead if you notice any of the following:
- A hole larger than roughly 15cm, or damage that spans a stud or the join between two sheets
- Soft, crumbling or damp plasterboard around the hole, which can point to a moisture source behind the wall rather than simple impact damage
- Cracking that keeps reappearing in the same spot after repair, which can indicate movement in the frame rather than a one-off knock
- Damage near a power point, switch or anything electrical
For the vast majority of everyday plasterboard damage though, a tub of filler, a putty knife and a bit of patience is all it takes to get a wall looking new again.
Join The Discussion